Inverted Sugar

July 13th, 2009

I use inverted sugar mostly for my ganache, which is used for truffle centers. The main purpose of this is to extend the shelf life without adding preservatives. But, it also helps the centers maintain a nice balance of a firm consistency and creaminess.  A few people have asked questions regarding what this is and how to get it. I must first explain the composition of regular sugar to help fully understand what inverted sugar is.

The Science of Sugar

Common table sugar as we know it is otherwise known as Sucrose, naturally obtained from sugarcane or sugar beets. The carbohydrate sucrose is a disaccharide, which is a chemical bond of the sugar molecules fructose and glucose. (Glucose is also sometimes referred to as Dextrose.) Both fructose and glucose are simple sugars and are composed of the same carbon, oxygen, and hydrogen atoms, but differ structurally.

What is inverted sugar?

Inverted sugar is produced by taking sucrose and splitting the fructose and glucose molecules.  This inversion process is called hydrolysis, a chemical reaction which uses acid, water, and heat to break the bond of molecules. Commercially sulfuric acid or sodium hydroxide are used to help speed up the process and are later neutralized.

Why use inverted sugar?

Inverted sugar binds with moisture instead of contributing to it, lowering water activity. This helps to prevent bacteria growth, therefore extending the shelf life of the finished product. It is also sweeter than sucrose and is used as a doctoring agent to prevent recrystallization of sugar, as well as improving the overall texture of the finished product.

How can I obtain inverted sugar?

This inverse process can also be done at home a few different ways. Catalysis of citric acid, ascorbic acid or cream of tartar may be used. By adding one gram of either per kilogram of sugar and boiling for approximately 20 minutes. Or by means of heat, simmering two parts sucrose and one part water on the stove for about 7 minutes.

Personally to avoid more work for myself, I buy it! It usually comes in a creamy liquid form that’s found in a plastic tub or bottle. It also contains approximately 20% water and tends to separate, needing to be mixed thoroughly before use. Inverted sugar can be found at local baking supply or kitchen supply stores and usually costs around $3.00 per pound.

*Side note* It’s also sometimes referred to as inverted syrup, invert, or trimoline.
To melt or not to melt?

July 6th, 2009

What is Ganache? Ganache is a filling created from an emulsion between chocolate and heated heavy cream. This filling is not only used for chocolate truffles but also for pastries and other desserts. For each, the consistency is changed according to the chocolate to cream ratio. Butter is also sometimes included in the mixture for added texture and smoothness.

I taught myself to make Ganache through book instruction when I first started making chocolates. There were few good books then, but a couple more have popped up here and there by Professional Chocolatier’s.  I was studying them the other day and noticed there are not one but two techniques to yield a “perfect” ganache. To Melt or not to Melt?

TO MELT: The method I first learned incorporated melted chocolate and heated heavy cream. I use a double boiler on the stove, to slowly and carefully melt dark chocolate to around 115 degrees F. (If using milk chocolate only to about 112 degrees F). While the chocolate is melting I heat the heavy cream and inverted sugar in a small sauce pan, stirring frequently on medium heat, to about the same temperature as the chocolate. Butter is set out in advance to achieve room temperature. I pour the melted chocolate into a small bowl adding the butter on top and begin to mix with an emulsion blender until the ganache becomes the consistency of pudding.

NOT TO MELT: This method, which I read about recently says to bring the heavy cream mixture to a rolling boil over medium high heat while stirring constantly. Then pour it on top of your chopped un-melted chocolate and let stand for about two minutes before mixing. Finally, incorporating the room-temp butter in small cubes after the emulsion has already taken place.

Baffled I thought to myself; have I been doing it wrong this whole time? Is there a better way? Can the two methods really yield such different results when the same amounts of all ingredients are used? Which one has the best consistency? Is the most efficient and practical for filled chocolates?

So, I proceeded to find out by making a batch of Double Chocolate Truffles using each method and tasting them for myself. Then, I invited some of my friends and customers to taste them as well. Both were good, but which one was better? We all agreed on which method was the best AND it wasn’t the method I was currently using on a regular basis!

What was the real difference? Texture and firmness were the most notable differences.”TO MELT” yielded a much softer ganache, too soft. And “NOT TO MELT” resulted in a much smother overall mouth-feel.

So NOT TO MELT it is!

Farewell hersheygifts.com

July 3rd, 2009

Oh darn! One less on line store to buy mass quantities of cheaply mass produced chocolates. Gifts that sit around your house for months until you offer them to company and are embarrassed by how they have turned white and chalky with age. Who can honestly eat a tin of 300 Hershey kisses?!

o_img_5523_1

Hershey announced yesterday that they will be closing their on line store July 31st because “the current business model is not sustainable”.

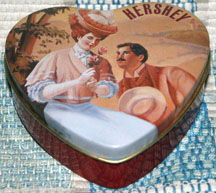
Did anyone ever think of restructuring their merchandising and packaging department? They try to pawn off the same lame gift boxes as “occasion gifts” by putting little messages on the kisses. Maybe they should swap out some of those tacky  Hershey branded tins for something more unique and classy. What ever happen to these artful tins? Don’t they make better gifts?

Hershey spokesman Kirk Saville said the company was looking into other e- commerce options, including strategic partnerships and licensing agreements.

Well maybe they should try incorporating some of those other higher end brands they have previously “acquired” such as Scharffen Berger,  Joseph Schmidt, or Dagoba into their gift products. Consumer’s have become more educated about chocolate and their tastes have evolved, no longer are we willing to settle for these foil wrapped masses.

Due to the site closure you can still purchase this stuff for a whopping 25% off, personally I wouldn’ t take if if they gave it to me for free! Lets just hope they don’t sell their stock to places like Target and Ross for some poor suckers to buy years from now at dirt cheap prices because it will in turn taste like dirt.

Good Luck Hershey. Maybe you should just stick to candy bars.

CocoaBella

June 29th, 2009
American Chocolatiers

American Chocolatiers

Last Summer my husband and I actually made a trip to San Francisco, chocolate capital of the country. We also spent an entire day driving around visiting as many chocolate shops as possible and there are a lot! We even had the pleasure of visiting CocoaBella which is where the above box came  from. This lovely company hit big with its genius plan to sell all of the best chocolates,  with out ever having to do any of the dirty work.  But that takes all the fun out of it, doesn’t it?! The CocoaBella web site is friendly and full of blue, also including a much needed Build-a-box feature for their large variety of chocolates.

I’ve taken notice of them more so lately with the addition of a few of my favorite Chocolatier’s, all of which are included in the above compilation box. Exciting right? So I quickly ordered it and awaited its arrival.  Good thing they use the same great temperature controlled shipping cartons we do because FedEx left this alluring  package on my doorstep to melt. (This is also why we include signature conformation in our shipping to avoid this situation.) Luckily, I returned home in time for un-melted chocolates.

I tore into the box instantly only to scarf a Norman Love piece of course, he being my favorite Chocolatier. Only to be saddened upon the discovery that, that was the only one. Mint Chocolate Chip. I had given the duplicate to a child in my company thinking it was the best flavor for her taste buds. Sharing is caring, I always say.  From the beginning of my quest to be a successful Chocolatier, Norman Love chocolates inspired me,  above all others and still do to this day.

Runner up goes to Christoper Elbow and the only other piece in this box I thoroughly enjoyed, Lemon. I rarely like  white chocolates period, yet oddly enough my two favorites were all or partly made of white chocolate. Well done boys!

Unfortunately I believed the rest of the compilation to be sub-par and  unworthy of mention,  turned off by funky textures or over bearing flavors. Duplicates of which still sit in the my box untouched.  Maybe I can pawn them off on a friend and they can tell me that mine are better, that’s what friends are for!

The season of savor- Summer

June 22nd, 2009

So what if I eat chocolate every day, so what if I don’t? Research right! Moderation is key, but never loose sight of the goal: SUCCESS. To become an expert one must sacrifice a few things, even if that means eating chocolate for breakfast. And after lunch. And before dinner. And before bed. ….. And maybe I find crumbles between the sheets on occasion. Woe is me.

Really though these are just the joys of Summer for me. I  have little time during the holidays to enjoy tasting chocolate, I rarely even think of it actually. Spending long days and nights elbow deep in chocolate, my focus is mainly on production and happy customers. The less I consume, the more for the consumer, meaning less work for me in the long run.

Thus, Summer has become the perfect season of savor for this Chocolatier. Not just of my chocolates and confections but also those of many others. I will attempt to share a few reviews of my own personal favorite Chocolatiers. Although I am warning you that I have become somewhat of a “chocolate snob” over the years. Something that undoubtedly comes with the job description but fortunately I am bringing my hubby and many of my friends down that road with me. Being a self taught chocolatier is never easy but always an adventure. Forward Ho!

Wine & Chocolate Paring

June 15th, 2009

winechoc

Yes, It’s finally here! My wine and chocolate tasting tips, followed by many excellent paring suggestions in the weeks to come.

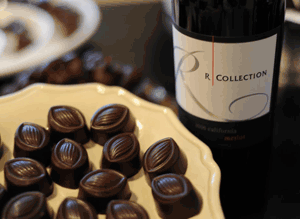
When paring wine and chocolate the goal is to create a well rounded experience, the flavors of both should compliment one another. The wine should not overwhelm, dominate, nor battle the flavor of the chocolate, and vice versa. The flavors in the chocolate should also be found in the undertones of the wine,  each bringing out the subtle flavor of the other.

The wines should be a touch sweeter than that of the paired chocolate. Lighter more elegant flavored chocolates boast well with lighter bodied wines, as stronger  bitter chocolates fair better with more full bodied wines. Mellow, buttery,  and nutty chocolates  pair well with Sherry and Port wines. As usual with tasting you want to start with the lighter chocolates and the lighter wines first, then on to the dark’s, and finishing with the sweeter port and/or dessert wines.

  • As with beer, proper procedure entails first tasting the wine on its own. Wine Tasting Specs
  • Finally, tasting again the chocolate and letting it melt on your tongue slowly but not fully.  Next, take a sip of the wine and swirl them together around in your mouth. Remember to breathe while doing this to enhance the flavors.

Of course not only the quality of the chocolate is important but the quality of the wine as well. You can’t expect to be wowed by a Hershey bar and a “jug-o-wine”. Remember to choose wines that are low in acidity because chocolate can be acidic too.  Hopefully you will try some of my suggested parings and experiment with some of your own.

Don’t be afraid to share and good luck!

Krispie Bite Makeover

June 8th, 2009
New window box packaging

New window box packaging

These sweet treats start with a layer of soft homemade caramel, a fresh batch of rice krispies cereal and marshmallow mix are layed on top, and then covered with another layer of caramel.   After being cooled and cut into bite size pieces they are hand dipped into intensely flavored milk chocolate, and topped off  with a drizzle of dark chocolate.

Krispie Bites are now sold in these window boxes, convenient for storage and resealable to ensure freshness. Adequately displaying the product helps to entice the consumer and preserve the beauty of the pieces. Great for a snack and even better as a gift, everybody loves Krispie Bites!

Peanut Butter Banana Swirl

June 1st, 2009

pnbb_icecream

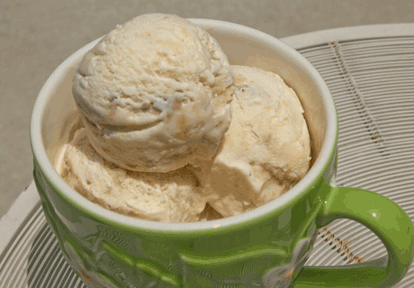
Recently I discovered that I like peanut butter and bananas together! I have heard of this “so called” sandwich before and always wrote it off as some sort of weird kid combo I just never got into.  And to think, I never even tried it.  I have also been trying to incorporate my favorite Peanut Butter Truffle into an ice cream recipe and then realized, I should swirl it into this roasted banana.

Recipe: Roasted Banana Ice Cream

Ingredients

Banana Ice Cream:

  • 1 ripe medium banana with deep yellow skin
  • 1.5 cups whole milk
  • 2/3 cup granulated sugar (divided in half)
  • 1 tsp vanilla extract
  • 4 extra large egg yolks
  • 2 cups heavy cream

Peanut Butter Ganache:

  • 4 oz. milk chocolate (35 to 40%) finely chopped
  • 3 oz. heavy cream
  • 1 oz. inverted sugar
  • 2.5 tbl peanut butter

Instructions

  1. Preheat the oven to 400 degrees. Place the banana in a small baking dish and roast for about 20-25 minutes. The skin will turn black and start to bubble. Cool banana completely then peel and mash. Cover and refrigerate until needed.
  2. In a small saucepan stir together milk, 1/3 cup sugar, and vanilla until sugar melts. Bring to a simmer.
  3. Meanwhile combine the egg yolks and remaining sugar into the bowl of a stand mixer, fitted with the whip attachment. Beat on medium-high speed until mixture is pale and thick, about 5 min.
  4. Switch the mixer to low speed and slowly add the hot milk mixture, just until combined. Do not beat to a froth.
  5. Pour all contents from the bowl into your sauce pan and cook over medium heat. Stirring constantly, until the custard coasts a spoon and reads 160 degrees on an instant read thermometer. About 5 min.
  6. Pour custard through a fine mesh sieve into a bowl and stir in heavy cream.
  7. Cover and refrigerate over night.
  8. The next day churn the custard in an ice cream maker according to manufacturers instructions. Then fold in mashed banana by hand.While the ice cream is churning you can make the peanut butter ganache. But be sure to have everything ready because ganache needs to cool to about 75 degrees before you swirl it into the ice cream.
  9. Place the chocolate in a double boiler over med-low heat. Stiring frequently until choc melts and reaches about 116 degrees.
  10. Meanwhile in a small sauce pan place cream and inverted sugar together, also over med-low heat. Stiring frequently until mixture reaches 116 degrees as well.
  11. When both have reached 116 degrees place the chocolate first in a small bowl and then pour the cream mixture over it. Mix with an immersion blender for about one min or until mixture has a pudding like consistency.
  12. Then add the peanut butter and blend again until fully incorporated.Once the ice cream has been churned and the banana folded in, you may then carefully swirl in the peanut butter ganache. Do this using a squeeze bottle or pastry bag and a butter knife. Make sure the ganache has cooled to about 75 degrees first. This prevents it from “mixing” too much into the ice cream and melting it. This ice cream is also best served after 24 hours of freezing for enhanced banana flavor.

Cooking time (duration): 1 hr (overnight prep)

Number of servings (yield): 4

Meal type: dessert

Copyright © Lady Chocolatier.

Double Chocolate & Ruby Stout

May 25th, 2009

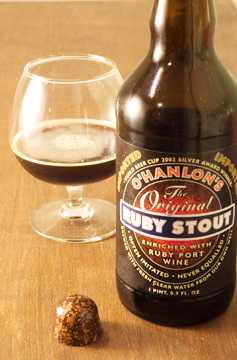
Finally, a stout I adore! O’Hanlon’s Ruby Stout, enriched with Ruby Port Wine. I am not a huge stout drinker but when learning of the delicious parings of Ruby Port Wine and chocolate I thought I would give this stout a go. I was impressed with its smoothness and soft texture. Smells like red fruit and roast malt. Tastes are complex and similar to the smells also with some woody and chocolate flavor.

Pairs excellent with our DoubleChocolate Truffle. A semi-sweet chocolate ganache and a dash of vanilla, encased in a bitter-sweet shell. This crowd favorite is splatter painted with colored coco butter.

I am anxious to try this beer also with our Raspberry truffle,  I believe the fruit notes would compliment each other nicely.

Always remember proper paring procedure entails first tasting the beer on its own.  Beer Tasting Specs

Then tasting the chocolate on its own. Chocolate Tasting

And Finally tasting the chocolate again and letting it melt on your tongue slowly but not fully, next take a sip of the beer and swirl them together around in your mouth. Remember to breathe while doing this to enhance the flavors.

Happy Tasting!

Fresh Lemon Sorbet

May 18th, 2009

With many hot, hot days here in southern California  it seems as if Summer has come early for us this year.  Many locals have citrus trees growing right in their back yards!  I am fortunate enough to have a few  friends that are willing to share their fruits.  Nothing is more refreshing on a hot day than a fresh scoop of Lemon sorbet!

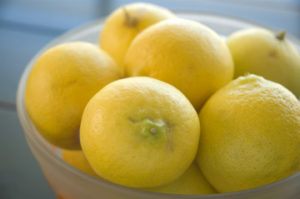
I used Meyer Lemons which are sweeter and less acidic in flavor than the more common lemon and also have a fragrant and edible skin. About 10 lemons yielded 2 cups of juice.

lemons4

2 cups granulated sugar

3 cups water

2 cups fresh squeezed lemon juice

1 tablespoon fine lemon zest

Combine sugar and water in a medium sauce pan and bring to a boil over medium high heat. Reduce heat to low and simmer with out stirring until the sugar dissolves, about five minutes. Cool completely.  Then stir in the lemon zest and lemon juice. Refrigerate over night or until mixture is cold. Transfer to ice cream machine and turn on for 25 to 30 min or until it reaches desired consistency.  If a firmer consistency is desired store finished product into an airtight container and freeze for at least two hours. Remove about 15 min before serving.