Event Update Spring 2011

May 2nd, 2011

Everyone always asks where they can buy our truffles and confections besides on line and because of the short shelf life of our preservative free chocolates I keep them pretty exclusive. If you live here in southern California, specifically the LA area here’s your chance to visit one of our booths at these two great shows!

First up and just three days away, this Wednesday and Thursday May 4th and 5th from 5 to 10, Sheckey’s Girls Night Out! No boys allowed here, just us girls doing what we do best, gabbing it up with our best friends and shopping! This uber girlie event pairs beauty and fashion with cocktails, oh my! And every girl likes a good chocolate now and then so I will be there to represent only the best. I will be featuring and sampling new Krispie and Nibbley Bars, hopefully sporting my new LC t-shirts and including a surprise gift with each purchase! So if you live near by grab your best gal pal and join us, we will be there both nights so no excuses! Click the link below to buy tickets now on sale for 20$ which include a rad swag bag.

Then on Saturday and Sunday the famed Unique LA! Celebrate Mother’s Day weekend May 7th and 8th from 11 to 6 on the California Market Center’s 13th floor penthouse, over looking downtown LA. This is our third show with them and we just love surrounding ourselves with hundreds of local, fellow entrepreneurs. With over 300 vendors, there’s sure to be something for everyone! Including not only plenty of stellar food and desserts, but clothing, jewelry, art, bath & body, and even kids stuff! Speaking of the kiddos, Unique LA always has a great vibe and is kid friendly with free craft workshops and free admission for kids 12 and under. Come find our booth for some delicious samples including Smores‘ with out the campfire! Get em’ while there “hot” or before there gone! Of course we love to shop in support of local business too and if you spot our team roaming the halls you might just receive a sweet surprise! Hope to see you there!

Tea Infused Truffles

March 15th, 2011

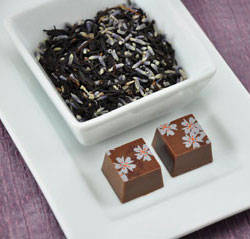
Lavender & Earl Grey Truffles

Yes, you can use tea to flavor truffles! I’ve been doing this since I first started back in 06′ and have gotten more and more into it over the years. I begin by steeping loose tea in heavy cream for about 15 minutes and then strain it out. The cream is now infused with the tea flavors and I then blend it into the chocolate for making my ganache. This enables me to experiment with an endless amount of flavor combination’s!

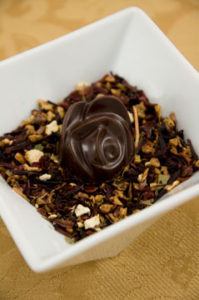
Raspberry Truffle using Raspberry Nectar tea from Tea Forte.

Initially, I bought basic premium teas online from China Mist such as mint and chai, which I still use today. Although all of their tea’s are high quality, organic and fair trade, I wanted to branch out to more flavor possibilities. This is when I discovered blends from Tea Forte like Raspberry Nectar, White Ginger Pear and Orange Pomegranate. All of which go exceptionally well with chocolate! I also love Tea Forte because they have so many excellent gift sets.

More recently I was so excited to find Bird Pick, an awesome tea retail store and cafe’ in my own neighborhood! Bird Pick has a large selection of loose teas and herbs as well as blends. I love being able to physically go into the store and smell everything! They have a great selection of tea accessories as well and always have samples brewed and are willing to brew anything else you might want to try.

Sage, Licorice Root and Rose Hips for infusions.

All this has inspired me to experiment with my own blends using the different teas leaves, herbs and dried fruits I have discovered. Look for more pictures like these to pop-up on my site under the truffle descriptions and for a “Tea Bouquet” Truffle Assortment in the coming weeks!

Askinosie Chocolate

March 11th, 2011

Not many days go by that I don’t struggle with what I do and the obstacles that come with starting your own business. I enjoy working with chocolate because it keeps my creative juices flowing and because chocolate makes people happy. But I’m still conflicted; I feel strongly that I should be doing more good. That I am capable of helping others and that I have a responsibility to improve this world in which we live. I probably spend too much time pondering this and not enough time taking action. But I also spend quite a bit of time tasting other peoples chocolate, to help evolve my taste buds and to make sure my products are up to my own standards.

This journey led me to Askinosie Chocolate and only now do I feel like I have validated all those empty bar wrappers. Shawn Askinosie is an inspiration, and my new hero! It will only take one look at his simple, yet effective and easy to use website, to see how he stays connected and uses chocolate to not only bring people together but to make the world a better place.

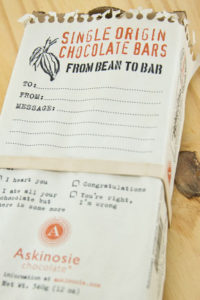
I’ve spent the last few weeks eating this gift package, which includes four single origin chocolate bars. Slowly trying to pull out the different flavors and nuances of each one, trying to figure out which one is my favorite and it’s hard! This is chocolate in its purist form, made with organic cane juice and includes no added vanilla, because it doesn’t need it! Askinosie not only works with the farmers directly, to purchase beans at higher than fair trade prices but has implemented the “A Stake in the Outcome” program from which the farmers receive 10% of the net profit that is made from the chocolate using their beans.

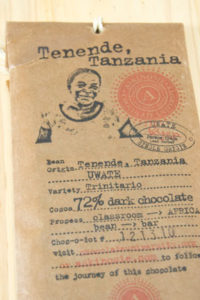
Their rustic packaging is Eco friendly and also includes so much information about the bar and it’s sources! Such as place of origin, bean variety and the name and photo of the lead farmer from which the beans were purchased. You can learn even more specifications about each bar on their website, in a section called Choc-O-Lot. Upon entering a serial number found on your wrapper you may view their logs of this bars life, including dates of bean shipments and roasting. They also share with us the exact cocoa butter percentage per bar, a rare but if not unheard of practice! This helps us, as the consumer to further appreciate all of the steps that go into making good, fair chocolate.

I could go on about this company and the good work they do in their community and around the globe all day, but now it’s time to talk about the most important part- the chocolate! Don’t get me wrong, all this other stuff is just great but you have to have an amazing product to back it up and that they do. This ladies and gentlemen, is THE BEST CHOCOLATE I have ever tasted and I’ve tasted a lot. I will even go on to say that this is the best chocolate in the world right now.

In my gift set there were four bars; Tenende Tanzania, Cortes Honduras, Ecuadorian San Jose Del Tambo and the same Ecuadorian bar including cocoa nibs. I’m amazed at their branding effort, each bar being molded with their company name in block letters. I very much enjoy these break off portion sizes and how thin they are. While I thought the Ecuadorian bar was the most bitter of the group, no surprise because of it’s Arriba beans, it’s so interesting how the flavor seemed to change so much when the nibs were added. While the bar on it’s own had these sort of marshmallow undertones, the nibs add such an unexpected fruitiness. And while the bar from Honduras is of course as delicious as the others, I am in love with the Tenende Tanzania bar! I never knew African beans could be so complex with fruit, tartness and citrus. Maybe this is because I’ve never had a single origin bar from Africa made with Trinitario beans. This is the kind of chocolate that excites your taste buds so much that you can’t get enough of it! I highly suggest you try some for your self and help support cocoa growth and education around the world. I only hope that one day I can be a part of something this extraordinary.

Chocolate Talk- Library Lecture & Tasting

February 28th, 2011

Last week I spoke about chocolate at three different libraries here in LA county and Saturday marked my 8th lecture for a program I like to call “Chocolate Talk”.

I have developed this program to increase my public speaking skills and to share what I have learned about the wonderful world of chocolate! I am a self taught chocolatier and small business owner and for 4 years now I have been making and selling chocolates via my home made website. Ladychocolates.com is a collaborative effort between me as a photography lover and my program learning, web building on-the-side, genius of a husband.

Last year while visiting Costa Rica for vacation we got to see first hand how cocoa is grown, harvested, and made from bean to bar on a farm. Of course being a photographer I took lots of pictures and thought this process was so cool that it would be an interesting thing to share. Before I got into working with chocolate, I had no idea where it came from and I figure the average person probably doesn’t know either.

The perfect sharing opportunity came by way of a librarian and the Chocolate talk was born! After my brief introduction, I begin a one hour lecture and tasting by sharing my farm experience through showing printed 8×10 photographs of the whole process. I pass these pictures around while explaining the process in which chocolate is made step-by-step. I also bring along some props like cocoa beans, to see and smell.

I explain how cacao is not only grown on this farm but how they use it to make their own homemade chocolate. I expand on how this would be accomplished in a factory, verses by hand. We then go on to our chocolate tasting! Here I instruct the five points on how to have a “proper” tasting and sample 3 different chocolate bars for comparison.

I then touch base on single origin, organic, and fair trade chocolate and it’s importance. Followed by explaining the difference between a chocolate maker and a chocolatier I explain what I do and how I make truffles and other confections. I also bring along these truffles for tasting as well. I welcome questions at any time which help move the lecture along into a discussion, especially by the time we are tasting.

I have enjoyed these experiences so much that I wanted to write about it. Not only to share about the program, but for what it has done for me. And to have a record of these lessons so I can reflect on them years from now, when I don’t have the time to sit in traffic for two hours to speak to 20 people about how awesome chocolate is and why you should appreciate it. I enjoy being around people and sharing with them my experiences and all that I have learned. I have learned how rewarding teaching can be and how important it is to be prepared. This encourages me to keep learning and to expand my knowledge, not only to be smarter but to be a better teacher. I love that when a librarian is in the room they wont hesitate to politely correct you when your facts are wrong. This motivates me to stay active in the field and focused on my profession, my goals and what I can do to better the world pertaining to chocolate.

This experience became extra rewarding today when a girl who attended one of these talks last week called to interview me for a school project. She said she needed to interview a business owner. How cool is it that?! It’s not often I stop to reflect on questions like, “What I like most about being a business owner?”

-Well, not only do I get to set my own hours and be my own boss I get to wear the many different hats of being a small business owner. From creating new chocolate flavors, to packaging special gifts and shipping them all over the world. I also get to mix photography that I love, with making creations that I’m good by taking all the photos of my products and posting them to my website.

or “Do I ever get frustrated with my customers?”

-Chocolate makes people happy I told her, it’s not often I have to deal with an unruly customer. I usually hear nothing but praises for my work and creativity. How lucky am I?

Really lucky!! Some days I forget, but today I was reminded, by a 7th grader. Thanks Julie!

Dipping Marshmallow and other soft centers

February 8th, 2011

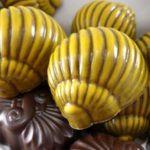
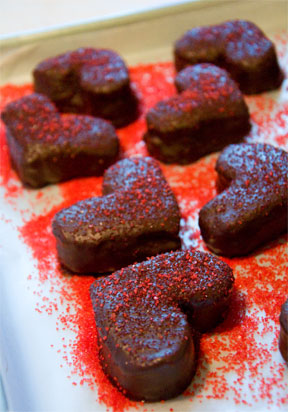
Valentines Day is almost here and that means hearts are everywhere! Since my customers can’t seem to get enough smores’ I decided to make some marshmallow hearts to go in a couple of our Valentines packages. While making these I found myself taking loads of photos of them, not only because they are cute but because they are super dynamic to photograph! Besides just showing off the photos I thought I would share a few tips on cutting and dipping homemade marshmallow.

(I’m not quite ready to share my secret recipe yet, I think I’ll be saving that for my book!)

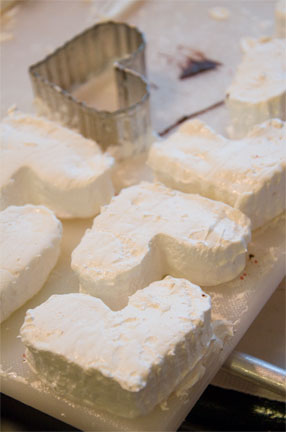
I usually let marshmallow set-up over night before I cut it. I always wear gloves and cover them with non-stick spray, along with my surface and all my cutting utensils. I do this because mm is so sticky, especially mine! The cutting board I use is from Surfas and is made of a heavy duty plastic with a slight textured surface. I like this board because it is large enough for a whole batch and has virtually no problem with sticking. For cutting out the hearts I used this metal cookie cutter, which I also sprayed. I only cut 8-8 hearts at a time and then washed, dried and re-sprayed the cookie cuter before cutting more. This must be done carefully to avoid deformed hearts! When I’m cutting squares for the smores’ I use a large regular knife and a small plastic knife. Plastic knives are amazing for marshmallow cutting because where excess mm usually sticks to the regular knife, on the plastic knife it doesn’t! While cutting I also frequently scrape any excess mm off of my board and knives with a dough scraper.
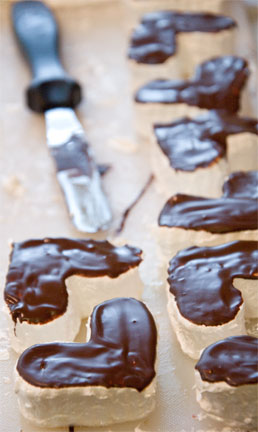
In the past I have been asked how to dip mm when it’s so soft and sticky. Back when I used to work in a chocolate shop we put them in the blast freezer before dipping and they weren’t even homemade! Later on after they reached room temp often the chocolate would crack, likely because of expansion of the mm. What I’ve learned to do now is make whats called a “foot” on them first. You do this by taking a spatula or knife and spreading a thin layer of chocolate on the mm and let it dry. Then you place that face down on your dipping fork and dip it that way, to keep the mm from sticking. I also do this with caramel and nougat!

When making these hearts, I put the foot on after they were cut out. I usually do this for the smores as well, but sometimes I use another method which is more useful for caramels and nougat because they are usually more firm. This method is done by pouring a thin layer of chocolate on top of the mm while it’s still in it’s prepared pan. After it dries, just to the touch you want to turn it out onto the cutting board, chocolate side down. This is tricky because you seem to have a small window of time to then cut the whole batch up before the chocolate dries too much. If the layer of chocolate is too thick or dries completely before you cut it, instead of having “perfect square feet” the foot will crack into pieces rendering the whole thing useless. The idea is to have a stable, flat, non-sticky surface to put onto the fork on to make dipping easier.

Happy Dipping!!

Best Organic Chocolate Bars- Theo Chocolate

January 30th, 2011

As much as I love the idea of  organic chocolate, I am usually put off by the texture. More  often than not I find it to be grainy or chalky. Recently I discovered there really is exceptional organic chocolate out there. When I speak of exceptional, I’m talking about a chocolate bar that you just can’t seem to put down. I’m excited and pleased to announce that these types of bars are finally popping up at our local grocers markets and for a reasonable cost! Enter, Theo Chocolate.

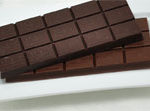
Based out of Seattle WA, Theo prides itself in being the first and only organic and Fair Trade chocolate factory in the US. Of course this grabbed my attention and besides great taste, one of the bars best features is it’s form. I love myself a thin chocolate bar and enjoy the freedom to portion it in anyway I see fit. This is possible by the absence of  dozens of small predetermined “bite-size” pieces. But the most amazing  part about a quality, high percentage chocolate bar is how satisfied you can be with just a small piece, or two.

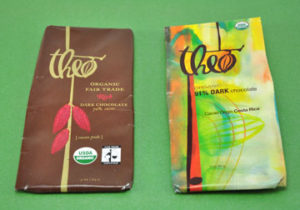
I first discovered Theo at my local Wholefoods, where I picked up their 70% bar.  I found its flavor to be pretty straight up chocolate, like a classic fudge brownie. A decent organic bar, although slightly unmemorable on it’s own.

Then Santa, (the good man that he is) slipped this 91% single origin Costa Rican bar into my stocking. It’s hard to believe that 91% cacao could seem sweeter than 70%,  but it can! This must be because of the type and/or origin of these beans, which are incredibly fruity. I have always fancied single origin chocolate on the fruity side, not to mention that this bar is by far the smoothest organic chocolate I have ever had, making it my new favorite!

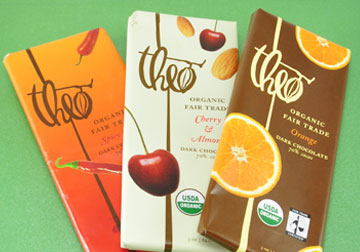
After daydreaming of Theo chocolate I notice a few of their other bars at my local grocery store, Pavilions. Because I think 4$ is a modest price for such quality, I picked up all three! And while I believed the orange to be too subtle and the Spicy Chile to be too hot I almost ate the whole Cherry & Almond bar in one sitting! The combo of salty roasted almond bits and tart dried cherries is truly an exceptional one. Bravo Theo!

I can’t wait to try more of Theo’s bars as well as some of their other chocolates. I even hope to visit their shop and take the factory tour next time I am in Seattle!

Chocolate making down on the farm

January 7th, 2011

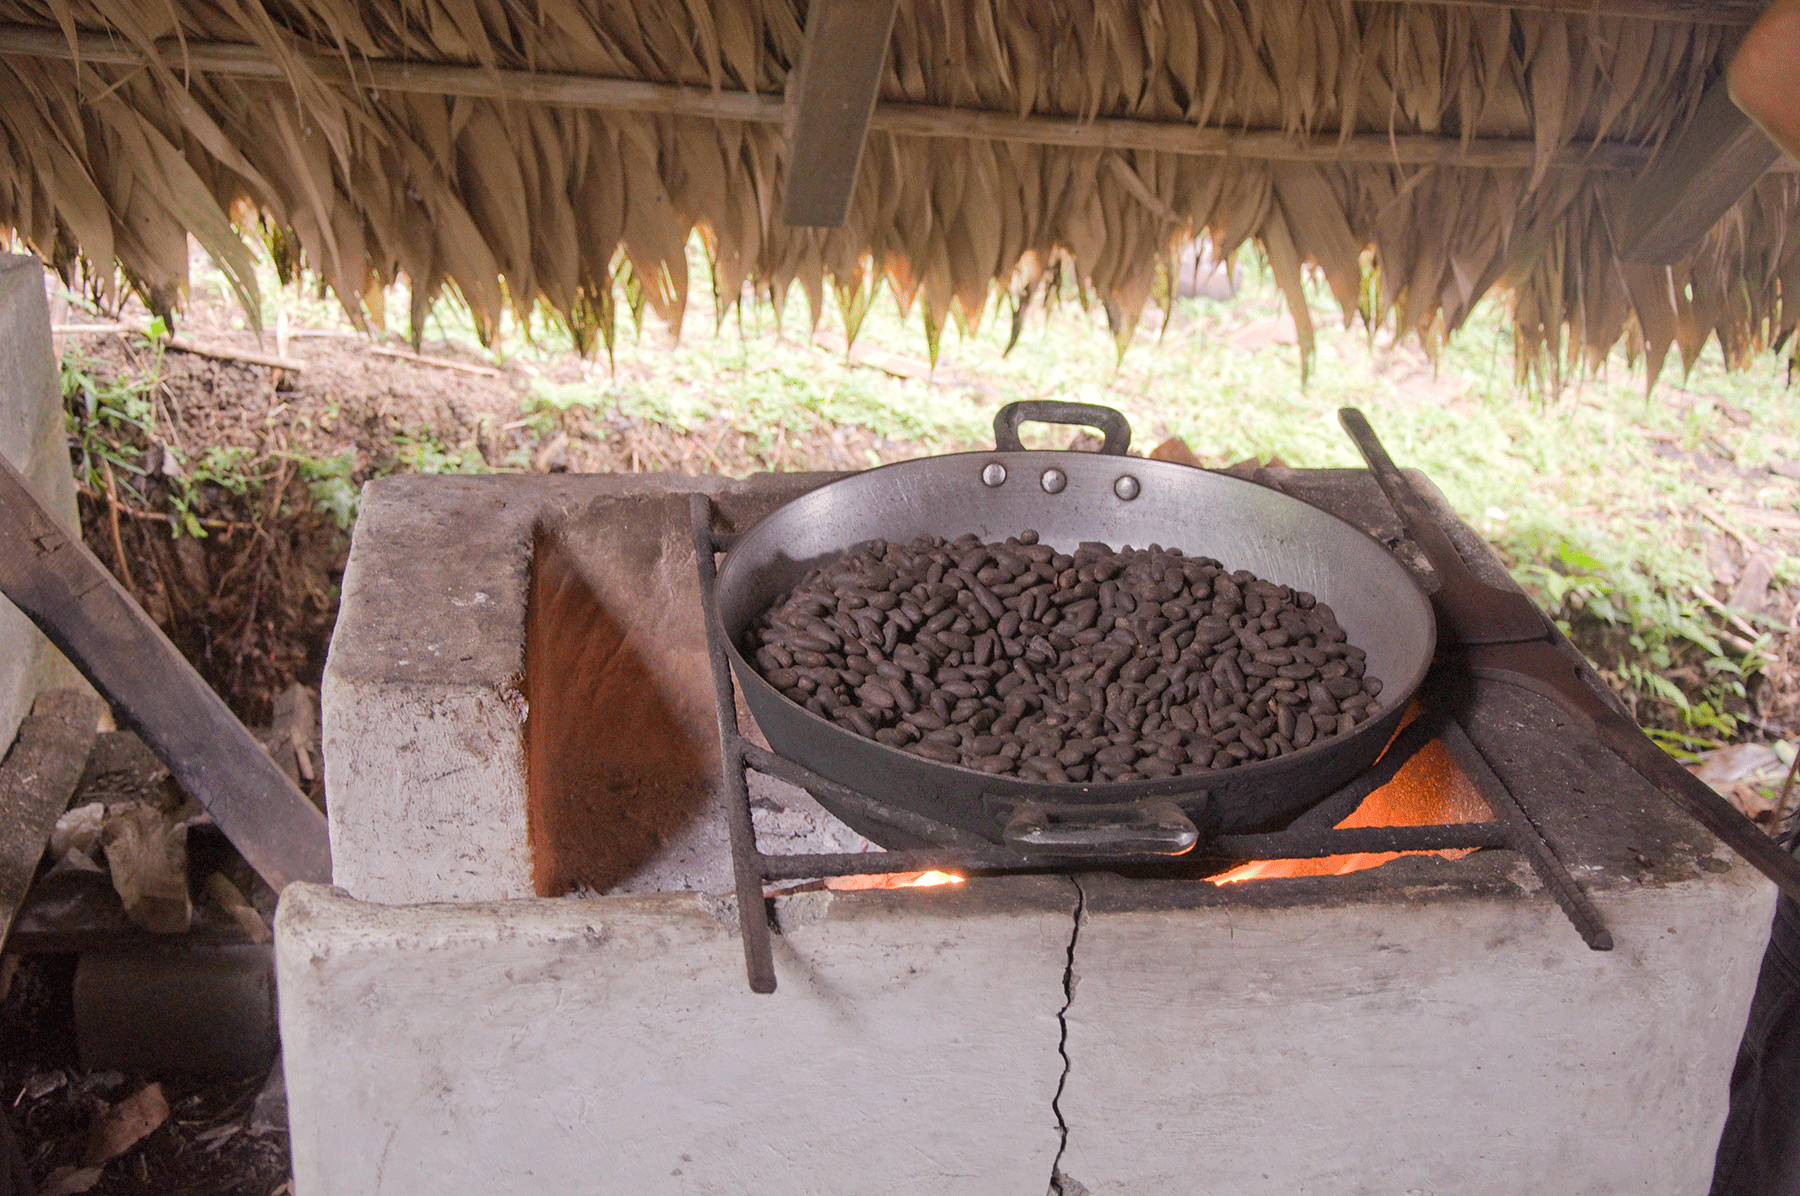
In my last post, The Cultivation of Cacao I talked about where chocolate comes from and how farmers grow and harvest cacao pods for the sale of their beans. Although the majority of chocolate is produced thousands of miles from where it’s grown and usually in mass quantities using large equipment, some farms actually produce their own chocolate. Like this one! Here at ChocoRart,  in Costa Rica we had the pleasure of learning exactly how it’s done, down on the farm style. After harvesting, fermenting and drying where I last left off, we begin with the roasting of the dried beans over an open fire.  Ahhhh.. the smell!

Roasting is done here over an open flame with the beans being stirred frequently to ensure even heat distribution and prevent scorching. This is a very important step in the process of chocolate making, further developing the flavors and aromas of the beans, bringing them to their full potential. Hence the smell!! The heat dries both the shell and inside of the bean, making it easier for later separation of the two. Roasting times may vary anywhere from 30min to 2 hours depending on the temperature and type of bean.

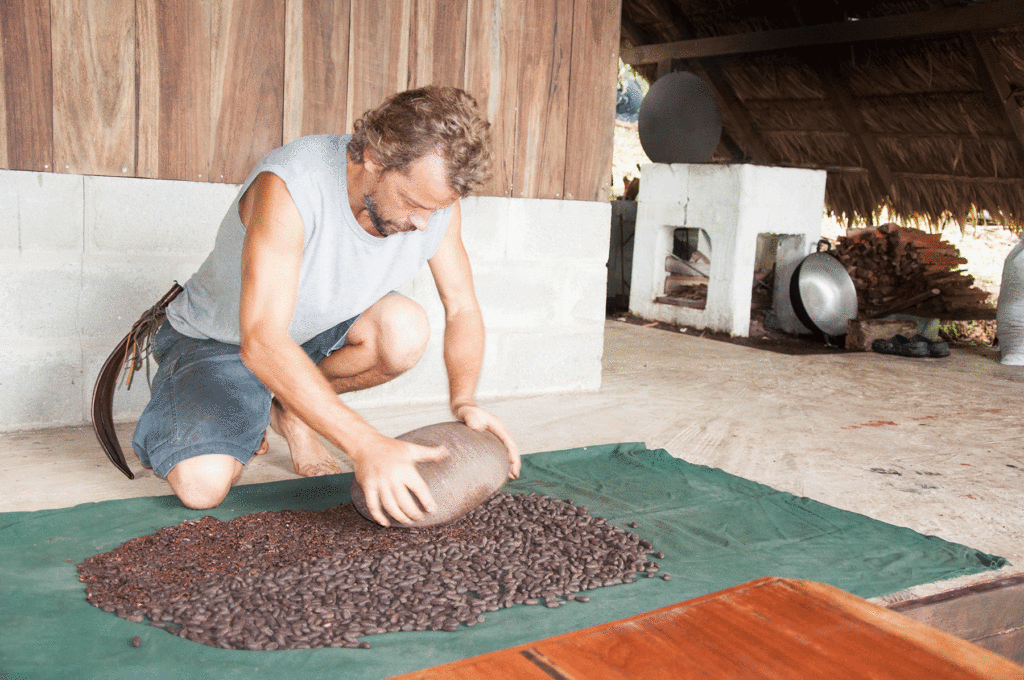
The next step is to crack the beans which is also called husking, or kibbling. Marco, the farmer demonstrates how they do this manually using a large shapely rock. A process which is normally done by machine called a winnower.

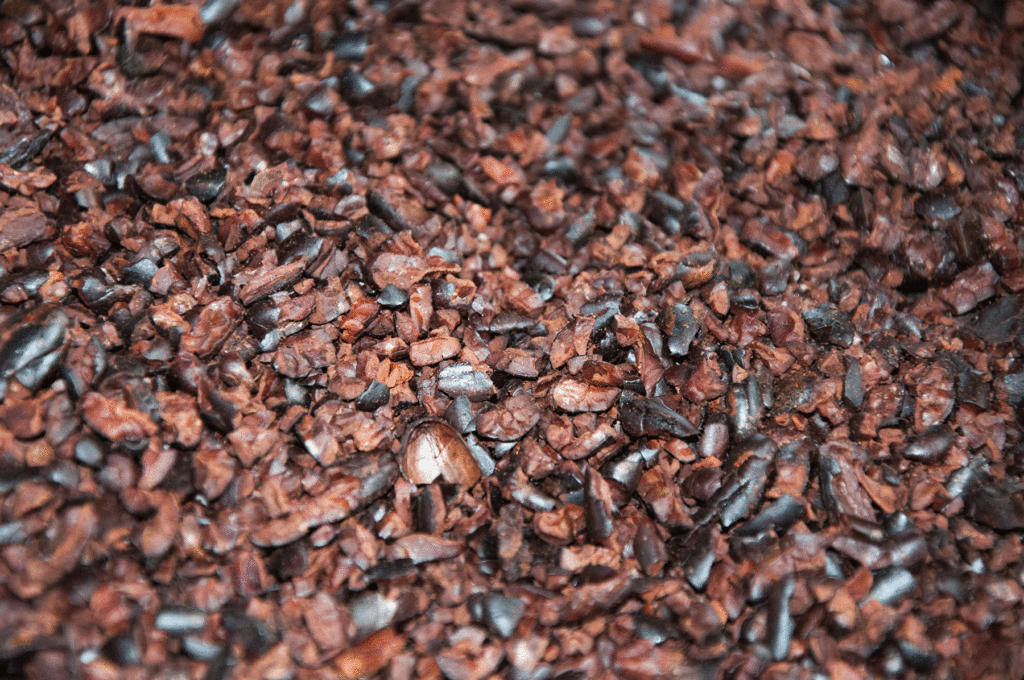
After this he separates the shells(husks), from the nibs, which are the inside of the bean. He does this by pouring the cracked beans in front a fan, the husks blow beyond the bowl and onto the cloth, while the nibs land in the bowl.

The winnower cracks whole beans by throwing them against a steel wall using a heavy force and then a fan blows the husks one way, while the nibs another.

While the winnower is likely way more efficient, amazingly enough this manual process worked pretty well. Although any husks that make it into the bowl must be picked out by hand after the fact.

Finally, what we are left with are the nibs. Cocoa nibs are composed of cocoa solids and cocoa butter, these are what is actually used to make chocolate!


Who knew it was so much work just to get this far!?

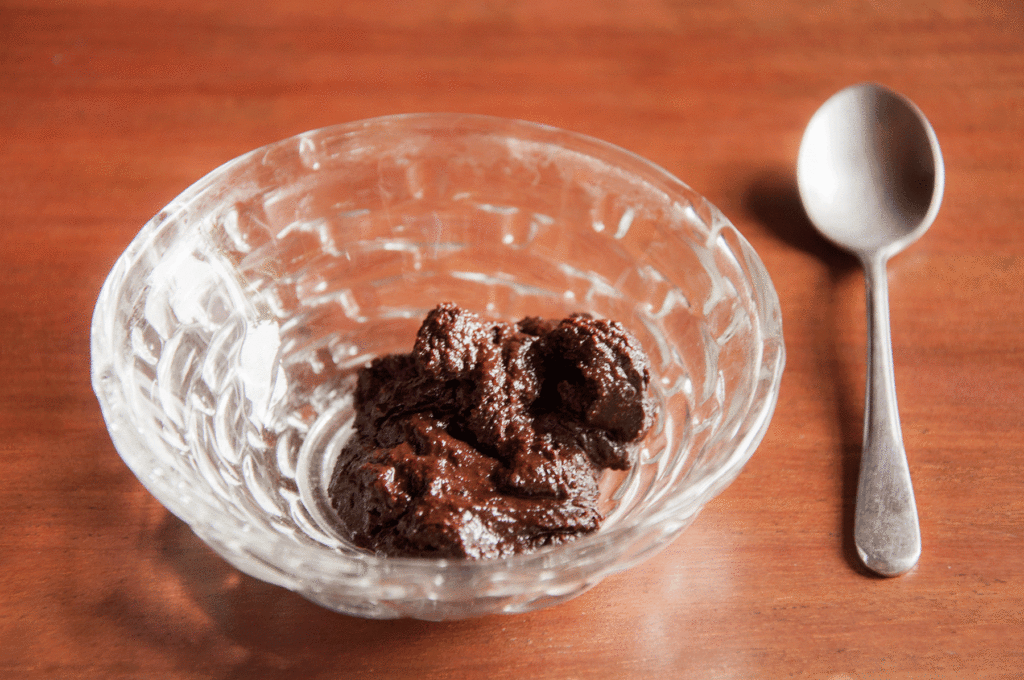
Here the nibs enter a grinding mill, with a hand crank. This crushes them into a thick paste called chocolate liquor, which in fact contains no alcohol. Again with the manual labor! Marco even convinced a local guide to give it a try, but not for long.

While this is taking place a type of molasses sugar they use, is cooked to liquid form over the fire. When both are ready the liquid sugar is poured through a fine mesh sieve into the chocolate liquor paste and mixed. After the two are fully incorporated it’s ready for a taste! Keeping in mind that this is unprocessed chocolate, with only minimal sugar added. At this point it tasted like warm brownie batter! Delicious but grainy unlike the silky smooth chocolate we are a custom to.


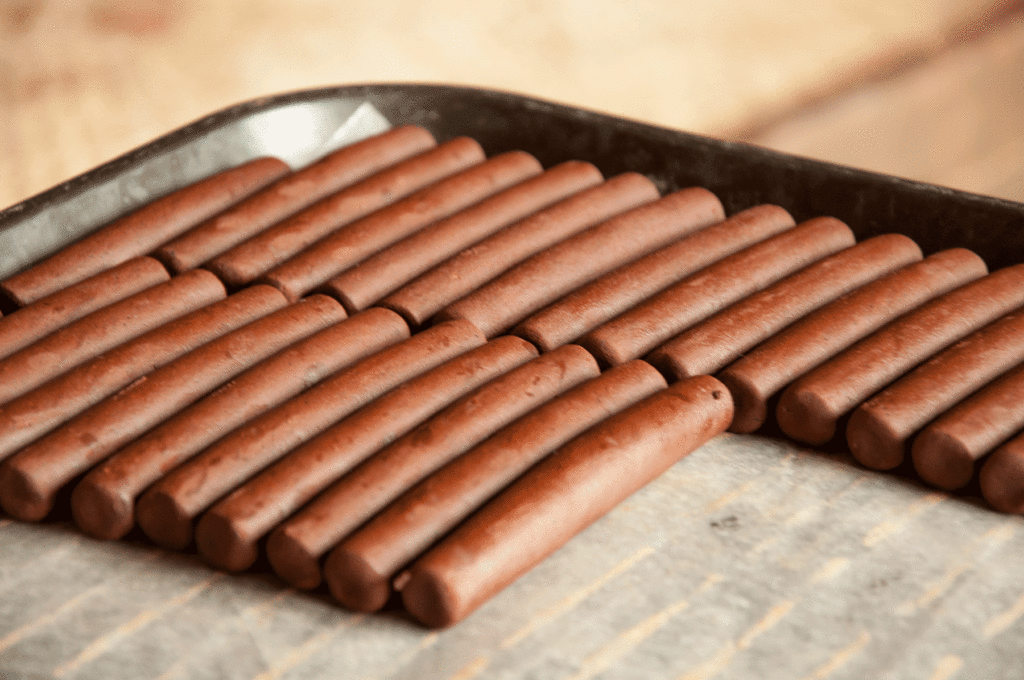
Once the mixture cools it is rolled into small cigar shaped logs, each to be wrapped in wax paper. Here at ChocoRart they make at least six different kinds of these chocolate logs. Flavors are introduced into the sugar while it is cooking such as vanilla beans or coffee grounds. Additions can also be made to the final mixture to add texture like shaved ginger or cocoa nibs. We tried all of these which were equally as delicious! Finished products are not only sold on the farm to guests but also at various markets and cafe’s around the town of Puerto Viejo where they live.

I hope now, like me you have a better appreciation for chocolate and how it is made! If you are interested in more photos from this trip please visit my Facebook album.

Where does Chocolate come from?

January 5th, 2011

The Cultivation of Cacao

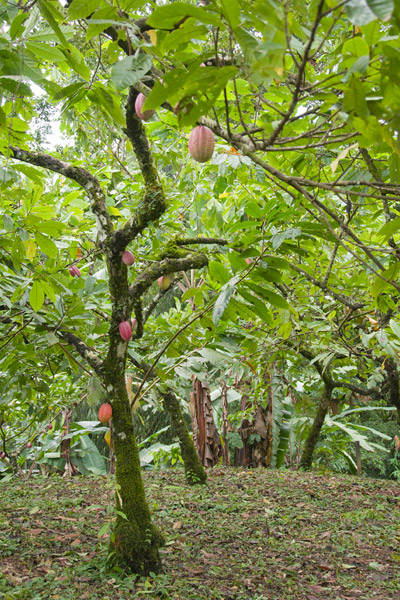
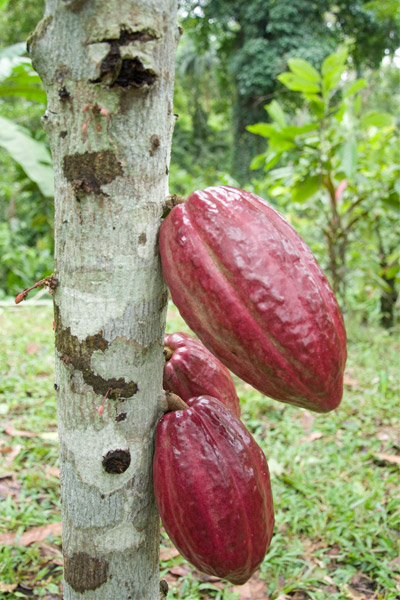
Before I began taking chocolate seriously as a career, I really had no idea where it came from (chocolate begins as a fruit? really?!?) Ignorance is bliss!…. but it’s not that interesting. Luckily enough,  I had the chance to visit a real cacao farm in Costa Rica to see how chocolate was made and do the other thing that I am most passionate about in life, take pictures!! All chocolate begins with the cacao tree, Theobroma Cacao meaning “food of the gods”.

A native to the Amazon rain forest, the cacao tree requires a warm humid climate with frequent rainfall and well drained soil. Therefore thriving within tropical climates 20 degrees north and south of the equator. Young trees are often grown under the shelter of taller trees such as banana or coconut palms. This canopy helps to create protection from the direct heat of the sun and any strong winds. Thus limiting their size and making harvesting easier.

Tiny pink and white flowers grow directly from the tree branches  and give way to fruit after pollination. Cacao fruit otherwise known as pods, can grow anywhere from 8 to 12 in. long and may vary in color. Hue changes as they ripen but most turn deep red or yellow.

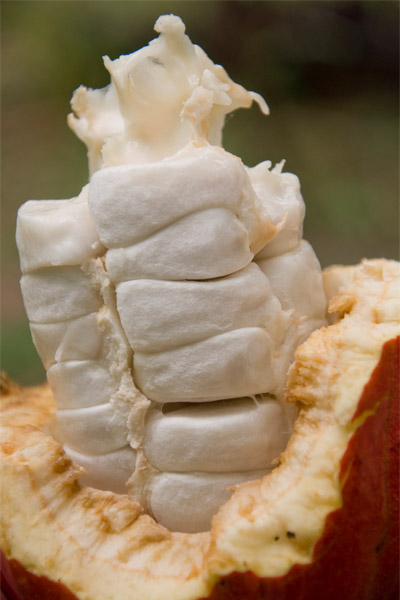
Experienced pickers know the pods are ready for harvest by the sound when it’s tapped on. Picking is done by hand and each pod must be carefully cut  from it’s branch to avoid damage to this highly sensitive tree. Machete’s are used for low branches and a curved knife fixed to a pole for those that are out of reach. Machete’s are also used to split the pods open by hand. Each pod contains anywhere from 20 to 60 seeds, which are embedded in a think sugary pulp.These insides are scooped out and the outside of the pod, or rind is discarded. Farmers will usually use these rinds as fertilizer to help redistribute nutrients to the soil.

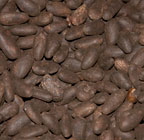
The seeds within the pulp are then fermented, a crucial process in creating quality cocoa beans. Each farm may use slightly different methods from the next, where some use solely banana leaves the farmer here in Costa Rica built teared wooden boxes with slats to help aid in the process. The seeds, within the pulp  are placed in the top tear of the box and covered with banana leaves. The high sugar content speeds up the transformation in which the pulp turns acidic, during this time the temperature rises and creates a chemical reaction within the seed. Dramatic changes occur and the seed then develops it’s chocolate notes and turns dark in color, now being more referred to as a bean. This may take place for up to a week but actual number of days depends on the method and the type of bean. About half way through the process the farmer will stir and turn the beans onto the second tear introducing more air and freeing up the top tear for another round of newly harvested seeds.

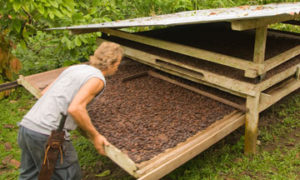
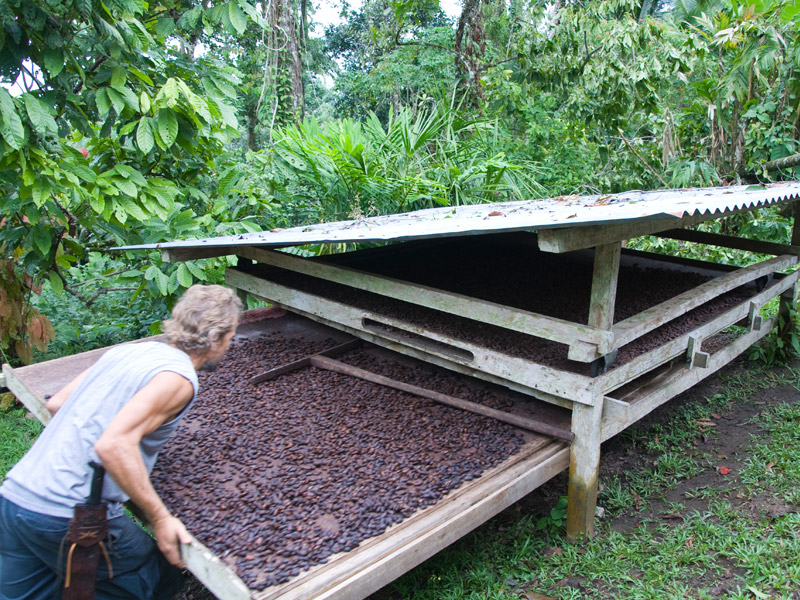
Next the beans must be dried slowly to reduce moisture and give the chemical reaction that begun during fermentation time to finish. All of the best beans are dried in the sun, usually for a period of a week. On this farm beans are spread out on these drying racks and turned frequently with a wooden rake to aerate them, ensure even drying and prevent mildew.  These racks are also built on rollers and include a cover so they can be easily protected from sudden rainfall. Various methods of drying can be used but often run the risk of  contamination from foreign odors the beans so easily absorb.

On this farm they roast their beans and make their own chocolate, which I will go more into more detail about in my next post. A special thanks goes out to Marco and his family at ChocoRart in Costa Rica for being so hospitable in giving us a tour of their  farm. Check out my facebook page for even more photos!

Reduce Reuse Recycle

December 2nd, 2010

I know reduce reuse recycle is all the rage right now but it’s important that we realize it’s not just a fad but a new way of life. Plastic bags are slowly being banned and we need to make an effort to remember to take those re-usable bags out of the trunk and into the store with us! I try harder everyday to do my part and it all started with the rinsing and washing of containers to go into the recycling bin. Who knew you couldn’t put crusty spaghetti jars straight into the bin?! After cleaning countless jars of salsa and pickles that my hubby loves, so dear I  realized something ….. why not re-use them?

I like to take things up a notch and remove the labels which can sometimes be sticky. The best method is to wait untill you have collected a dozen or so,  fill the sink with really hot soapy water and let them soak. Hopefully they come right off, if not or the jars are left with some sticky residue just bust out the goof off . This magical  stuff is great for all kinds of house hold stains, spills and sticky things and can be found at home depot.  If I really wanna dress these “new” jars up nice I paint the lids on put on new sticky labels of my own.

Recycling is awesome but it also uses energy to melt these old glass jars down just to make new ones. Why not reduce your carbon foot print by REUSING! It’s not rocket science, just doing your part. I’m big into organization of the home and work space and jars can be used to store all kinds of things like nails, buttons, rice and even chocolate! : )

I only bring this up because the holidays are almost here and I know people like to make their own cookies and candies for giving. What better container to give than one that is recycled! I found that my hand rolled truffles looked excellent in them because it showed off their different colors and textures.  SAVE THE EARTH!

Making hand rolled truffles at home

October 20th, 2010

Recipe: Double Chocolate SnowBalls

Ingredients

  • 7 1/2 oz. chopped dark chocolate
  • 5 1/2 oz. heavy cream
  • 1 oz. corn syrup
  • 1 tbl butter
  • 1 tsp pure vanilla extract
  • 16 oz. melted, tempered dark chocolate
  • 12 oz. White Chocolate
**I like to use 72% or 65% Dark Chocolate or a mix, one for the center and one for the shells. The sweet white chocolate shavings help to balance the stronger dark’s. **

Instructions

  1. In a small saucepan, heat heavy cream and corn syrup over med/high, stirring often until it comes to a rolling boil.
  2. Put the chopped chocolate in a separate bowl, pour hot mixture on top and then let this sit for about 2 min.
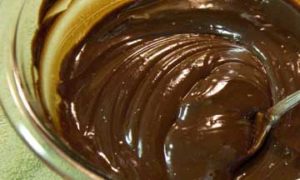
  3. Begin slowly stirring and then gain speed as the chocolate melts. Then vigorously whip the mixture to a pudding like consistency.

4.  Once the ganache is smooth and pudding-like,  let it cool for 5-10 min before you add the butter. Cut the butter into 4-6 little pieces and incorporate fully, then stir in the vanilla.

The ganache is now finished but needs to cool once more before you can pipe it. Line a baking sheet with wax paper. And go ahead and fill a pastry bag with your warm ganache.  I like to speed the cooling process by lying the filled pastry bag flat on the counter. When its cool to the touch, then its ready to pipe! (If you don’t have a pastry bag you can use a zip lock, don’t cut off a bottom corner until the ganache is cool.)

5. Pipe ganache into small piles, this recipe should yield about 40-45 truffles depending on  size. Take care not to make them too large because once dipped they will be huge! After piping you will need to let them set-up over night to become firm enough to roll. I like to store them in the oven, as long as you aren’t going to use it. It’s always a good idea to stick a note to the oven not to turn it on, in case you forget… to avoid disaster! Trust me ; )

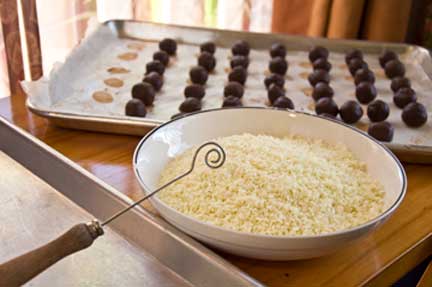
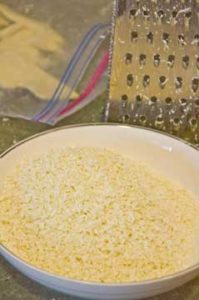
6. Now is as good a time as any to shave the white chocolate, which is hopefully in blocks or bars. Carefully, using the box grader which is quick and easy and produces nice shavings that remind me of snow, that’s why I call these truffles snow balls!

7.  It’s time to roll! Hopefully your little piles of ganache are nice and firm and as ready as you are. It’s best to try and keep your palms open while rolling these into neat round ball form. I like to wear food safe gloves for this step because it can get really sticky and if it gets TOOoo sticky I will put on a clean pair half way through.

8.  Dipping comes next when your chocolate is melted and tempered. I like to use dipping utensils like you see in the photos with round tips but a fork will work with a bit of a balancing act. Submerge the whole truffle in your melted chocolate and then fish out. Be sure to give your fork a tap on the side of your dipping bowl or shake it a bit to remove excess chocolate and avoid puddling. Then immediately roll and cover with your white chocolate shavings, leaving them covered for a few min to dry.  And voila!