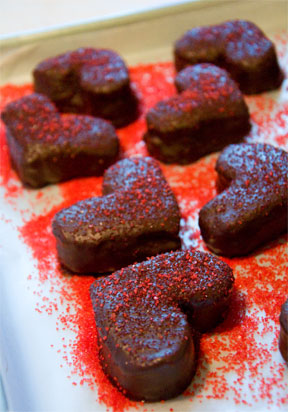
 Valentines Day is almost here and that means hearts are everywhere! Since my customers can’t seem to get enough smores’ I decided to make some marshmallow hearts to go in a couple of our Valentines packages. While making these I found myself taking loads of photos of them, not only because they are cute but because they are super dynamic to photograph! Besides just showing off the photos I thought I would share a few tips on cutting and dipping homemade marshmallow.
(I’m not quite ready to share my secret recipe yet, I think I’ll be saving that for my book!)
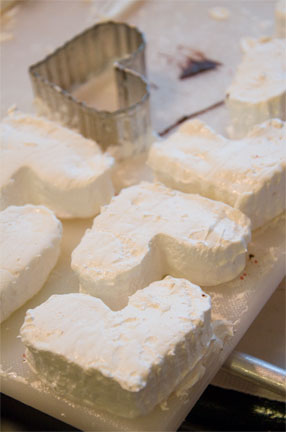
 I usually let marshmallow set-up over night before I cut it. I always wear gloves and cover them with non-stick spray, along with my surface and all my cutting utensils. I do this because mm is so sticky, especially mine! The cutting board I use is from Surfas and is made of a heavy duty plastic with a slight textured surface. I like this board because it is large enough for a whole batch and has virtually no problem with sticking. For cutting out the hearts I used this metal cookie cutter, which I also sprayed. I only cut 8-8 hearts at a time and then washed, dried and re-sprayed the cookie cuter before cutting more. This must be done carefully to avoid deformed hearts! When I’m cutting squares for the smores’ I use a large regular knife and a small plastic knife. Plastic knives are amazing for marshmallow cutting because where excess mm usually sticks to the regular knife, on the plastic knife it doesn’t! While cutting I also frequently scrape any excess mm off of my board and knives with a dough scraper.
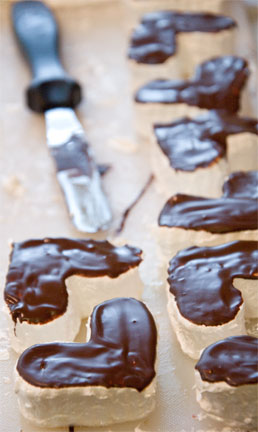
 In the past I have been asked how to dip mm when it’s so soft and sticky. Back when I used to work in a chocolate shop we put them in the blast freezer before dipping and they weren’t even homemade! Later on after they reached room temp often the chocolate would crack, likely because of expansion of the mm. What I’ve learned to do now is make whats called a “foot” on them first. You do this by taking a spatula or knife and spreading a thin layer of chocolate on the mm and let it dry. Then you place that face down on your dipping fork and dip it that way, to keep the mm from sticking. I also do this with caramel and nougat!
When making these hearts, I put the foot on after they were cut out. I usually do this for the smores as well, but sometimes I use another method which is more useful for caramels and nougat because they are usually more firm. This method is done by pouring a thin layer of chocolate on top of the mm while it’s still in it’s prepared pan. After it dries, just to the touch you want to turn it out onto the cutting board, chocolate side down. This is tricky because you seem to have a small window of time to then cut the whole batch up before the chocolate dries too much. If the layer of chocolate is too thick or dries completely before you cut it, instead of having “perfect square feet” the foot will crack into pieces rendering the whole thing useless. The idea is to have a stable, flat, non-sticky surface to put onto the fork on to make dipping easier.
Happy Dipping!!